A CloudFormation script to get a docker instance of pi-hole running in your AWS account
What is pi-hole?
Pi-hole (https://pi-hole.net/) is a network-wide ad-blocker. We won't talk about the ethics of ad-blocking here, but if you are interested in blocking most ads, and you don't want to install an ad-blocker client on all of your devices, pi-hole is for you.
Pi-hole was designed to be installed on a raspberry pi (https://www.raspberrypi.org/) and plugged into your home router. The idea is that this device becomes your home network's DNS server. All DNS queries run through the pi. The pi returns an empty response if the query was for an ad, and if not, returns it to the client as normal.
Pi-hole limitations
Pi-hole won't block all ads, but it does block most of them. At its most basic level, Pi-hole is just a DNS server with some blacklist and whitelist functionalities built in. Any request that comes through it is rejected or accepted based on those rules. Because it's based on DNS and domain matching, Pi-hole can't block ads that don't use DNS. Games on mobile devices are notorious for this. Many games have ads baked right in to the code. Additionally, ads that have the same domain as legit traffic won't be blocked. So you're stuck with YouTube ads even on pi-hole.
Why set this up in AWS?
Most people don't have an extra raspberry pi laying around the house. Raspberry pis are usually purchased with an express purpose in mind. They are incredibly useful and cheap, and they get put to work as soon as they are unpackaged.
Commitment is hard
Once you decide you want to do something that can be done on a Raspberry Pi, it can be difficult to make the commitment to purchase one. There are a lot of options and you kind of have to decide how much you want to spend on one and whether you want to "future proof" your purchase by buying one of the top-end ones "just in case" you decide to re-deploy it for a newer, fancier purpose than the one you bought it for.
AWS to the rescue!
As it happens, AWS has already has at least seven hardwares that can act just like a raspberry pi, and they're willing to rent it it out for pennies. I like trying things for pennies. Who even likes pennies anyway?
So, here is a a solution that will build a little network for you, spin up a virtual instance that has close to the same specs as a Raspberry Pi, and set up all the routing.
A Brief Primer on CloudFormation
If this is your first time in AWS, don't worry. I've done all the heavy lifting for you by providing this script. All you'll have to do is navigate to the CloudFormation service and point your account at the script. AWS will do the rest for you. Once the solution is set up, the service will spit out a URL you can visit, and you can finish configuring your awesome.
What is CloudFormation?
If you've never learned about CloudFormation, it's worthwhile to learn, especially if you're trying to figure out how all this cloud-computin' works. I'd recommend you take a look at some of the documentation and if you have the time, go sign up for an account on Acloud.guru or Cloud Academy and watch some of the videos they have for it. If you'd like a really good explanation in written form, my friend Aravind has put together a really great CloudFormation 101 post.
The main idea of CloudFormation is that since AWS provides virtually limitless hardware, they've provided a way to script out the provisioning of that hardware via this CloudFormation template. There are many advantages to doing this:
- You can share templates with people and allow them to re-create what you've done in their own account (you're welcome)
- You can tweak the template and redeploy
- You can source control your infrastructure
- You can integrate CloudFormation with other services like CodePipeline in such a way that when you check in changes to your template, they auto-magically deploy in your account.
- You can easily and quickly tear down what you just built with the click of a mouse.
There are too many other advantages to using CloudFormation to list here, but these are some of the ones I like the best.
Once you are comfortable with the idea of infrastructure as code, go sign up for an AWS account and we'll get started.
Deploying your new Pi-Hole via CloudFormation
- Sign in to your aws account
- Click Launch CloudFormation Stack
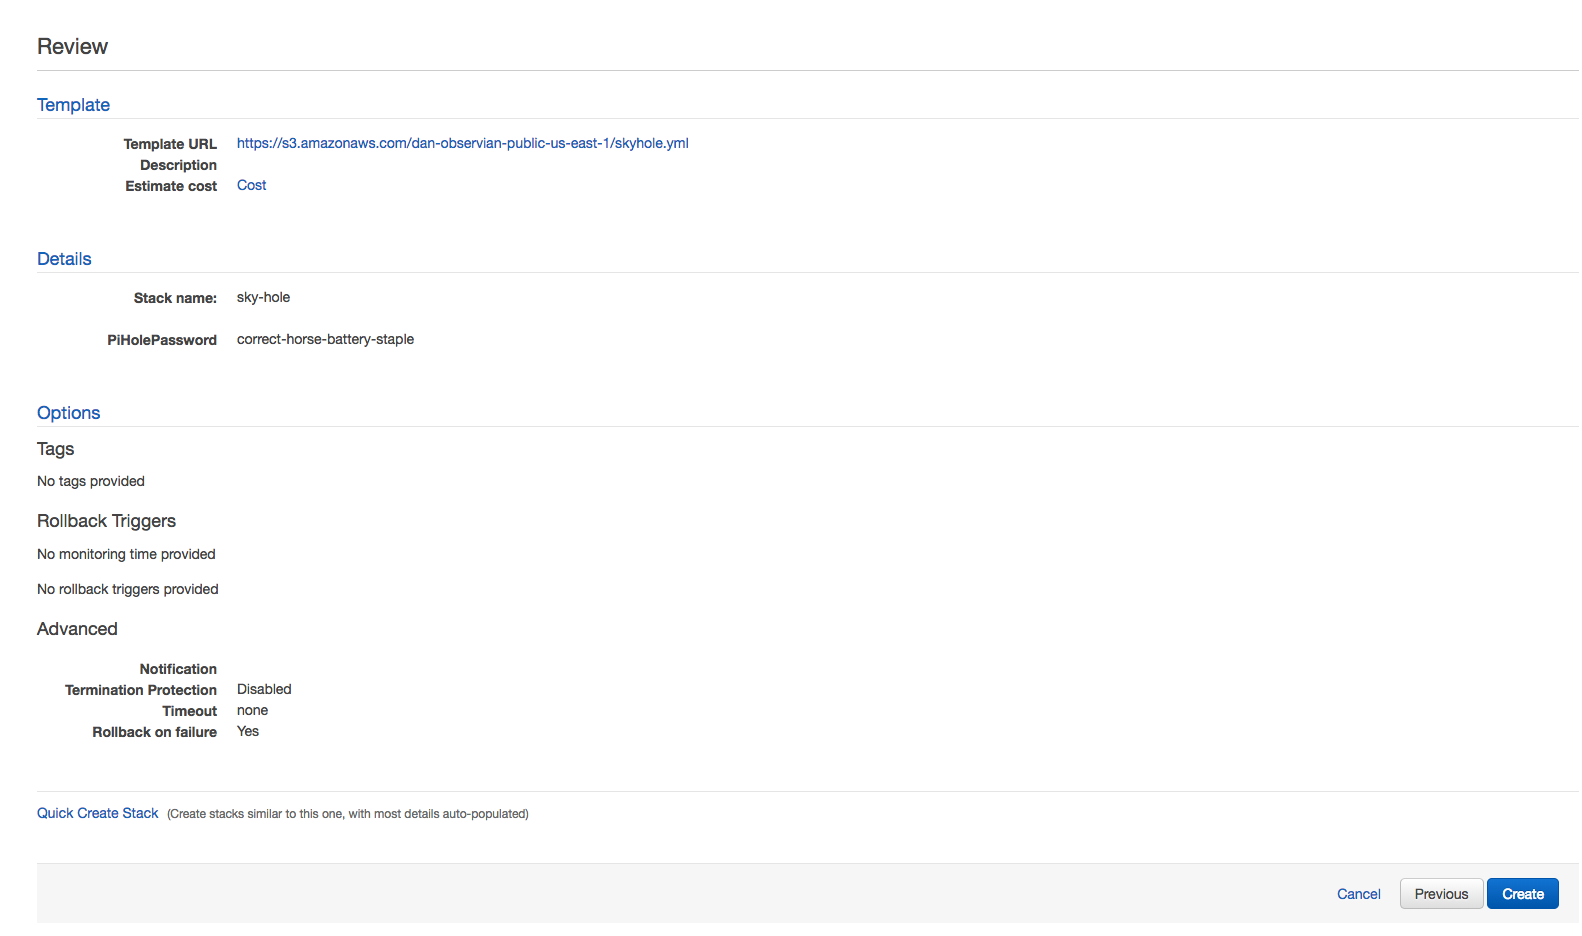
- You should see a screen like this
- If you want to, change the password and the stack name. Both are arbitrary.
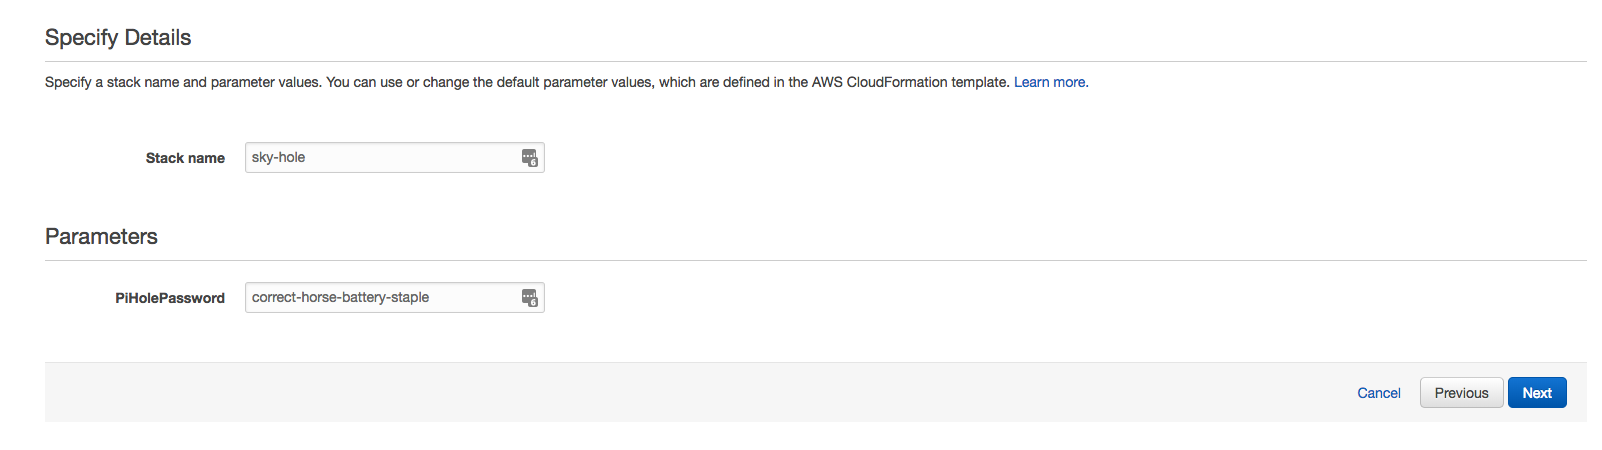
- Click Next
- There is a lot detail on this next screen, but don't be daunted. If you'd like to keep track of this stack, you can tag stuff here. Otherwise the defaults here are just fine.
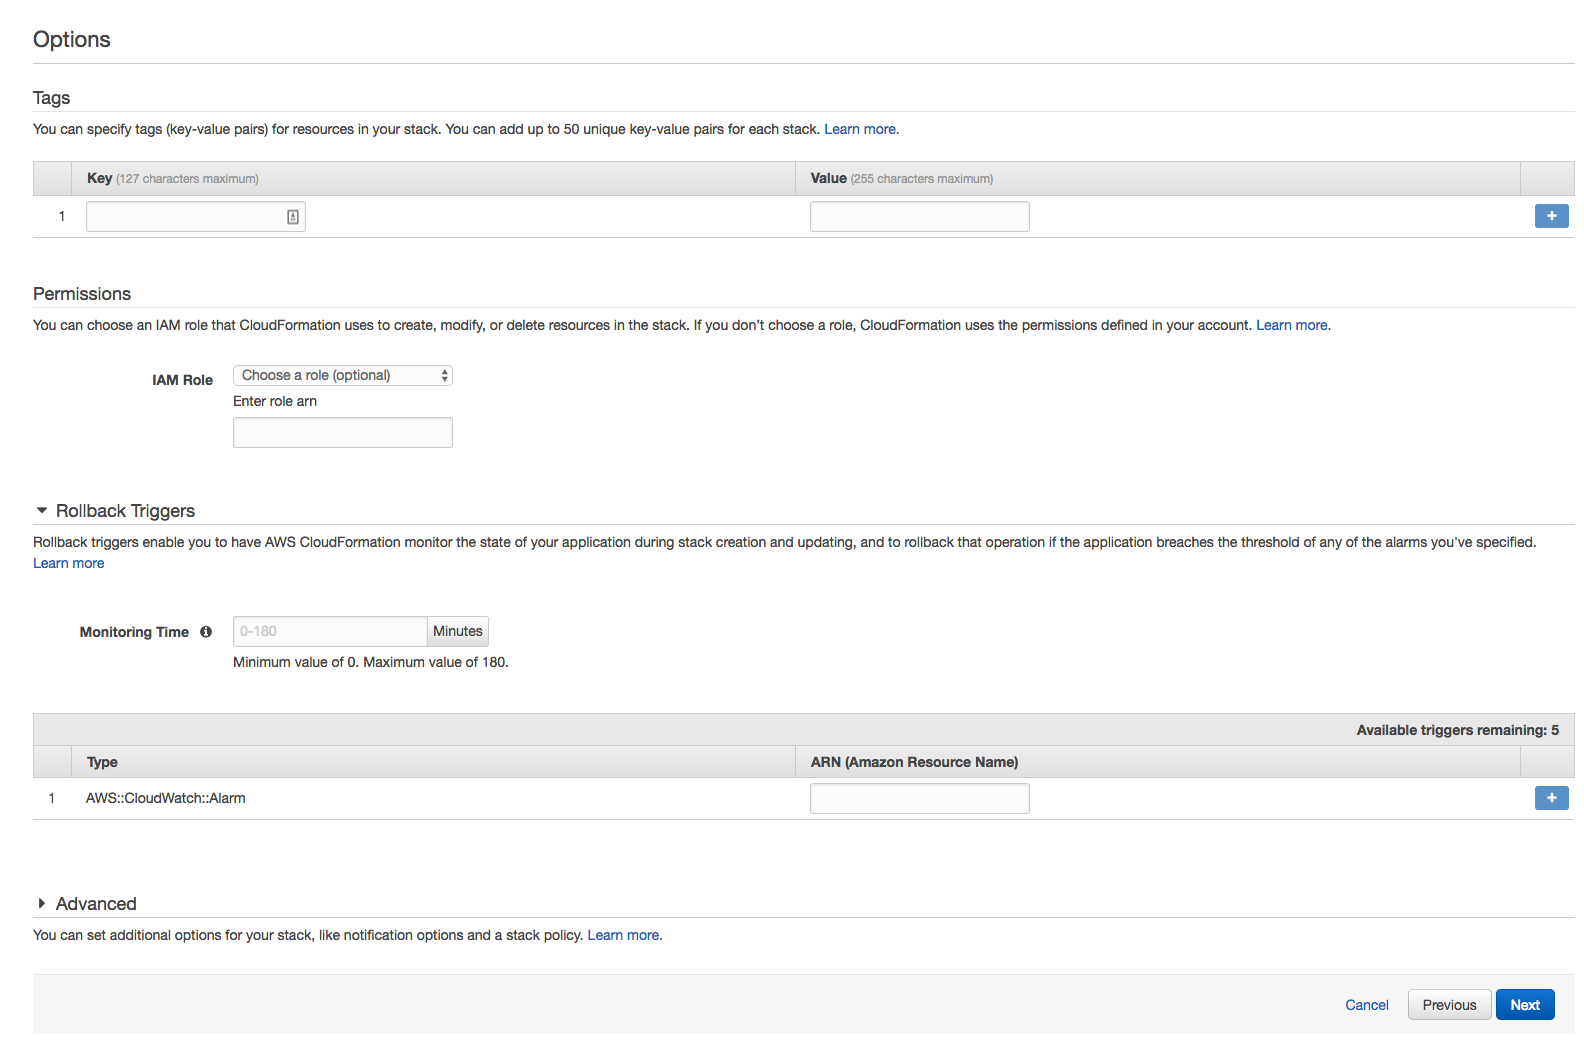
- Click Next
- On the next screen, you get a link to estimate the cost. This will vary by region, but in the N. Virginia region, the cost is about $8.50/month. You probably don't have to use it all month to decide whether or not you like it, but the option is there while you decide.
- Click Create
- Get a burrito. This takes a few minutes. Behind the scenes, the template is creating all the necessary infrastructure resources. VPCs, Internet Gateways, routes, subnets and let's not forget our actual instance.
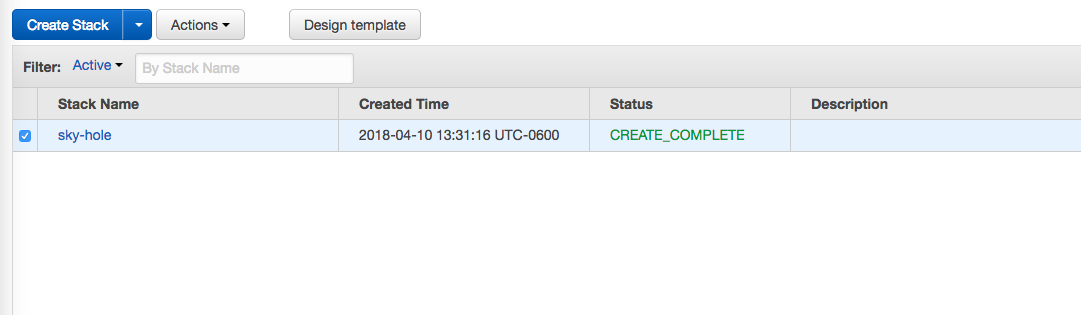
- On the Create Stack screen you'll see a CREATE COMPLETE message.
This means that the stack has finsihed sending the commands to the resources to be completed.
- EC2 instances take a few minutes to boot up, so even though you see a CREATE COMPLETE message on the stack, you won't be able to hit the pi-hole UI until the EC2 instance has a status of "Running" instead of "Initializing"
- Once your instance says "Running" you can hit your pi-hole! In the "Outputs" tab of the CloudFormation Stack, you'll see that it spits out a link you can click on that takes you right to the admin page of your pi-hole. From here you can login and put in the password you specified at the beginning.
- You'll need to configure either your client machine or your router to point to your new pi-hole instance. Since personal machines and routers are all different, I'll let your google-fu help you figure that out, as opposed to a tutorial that is either not-detailed-enough or too-detailed.
- Have fun configuring your pi-hole! If you need help configuring it, https://pi-hole.net has some great resources
Tearing Down your Pi-Hole
- Go back to the CloudFormation stacks you saw earlier
- Tick the box next to your skyhole stack
- Click Actions
- Click Delete Stack
- That's it! Cloudformation takes care of removing all the resources you created as part of this stack.
Bash or Docker?
#!/bin/bash
yum update -y
yum install docker -y
service docker start
IP=$(curl http://169.254.169.254/latest/meta-data/public-ipv4)
docker run -d -p 53:53/tcp -p 53:53/udp -p 80:80 -e ServerIP=$IP -e WEBPASSWORD=${Private1} diginc/pi-hole
A word on billing
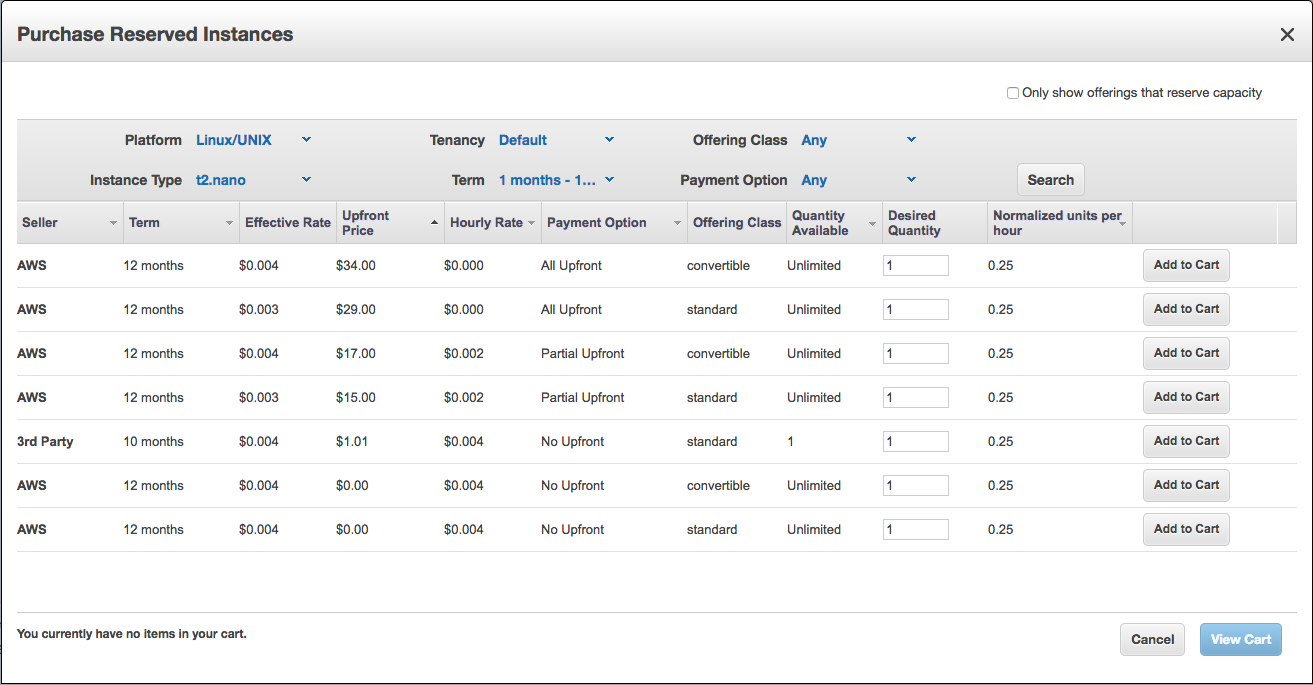
We chose a pretty small instance, and we chose to use on-demand pricing. If you were to change this to a t2.nano, your costs would drop from the $8.50/month. If you decided you want this to be a permanent thing for you, you might want to consider reserved pricing.
At the time this article was written, you could purchase a year's worth of your pi-hole for $29.00, not a bad plan!
There are lots of options for this, but the coolest part about all of this is that we were able to set this up without purchasing any hardware, and we were able to try out the product without any commitment.