Infrastructure as code is amazing. The fact that we can build entire environments using CODE is nothing short of miraculous. But tell me if this has ever happened to you:
- Cool! I just coded this sweet CloudFormation Script! Time to deploy it!
- Let me just open up the Console
- I'm gonna just upload this bad boy from local
- Now, we wait for the process to complete
- CREATE_FAILED
- Curses!
- What did I change? Oh no! It's not source controlled!!
But wait, what am I doing? This is code. This is easier than I'm making it.
Let's make this easier.
Luckily for us, AWS integrates really well with GitHub. Once you have your template in a repository come back to the console, and I'll show you how to set it up.
Create a CodePipeline
Navigate to the CodePipeline Service in the AWS console.
Click "Create Project" to get started.
Create a name for your CodePipeline
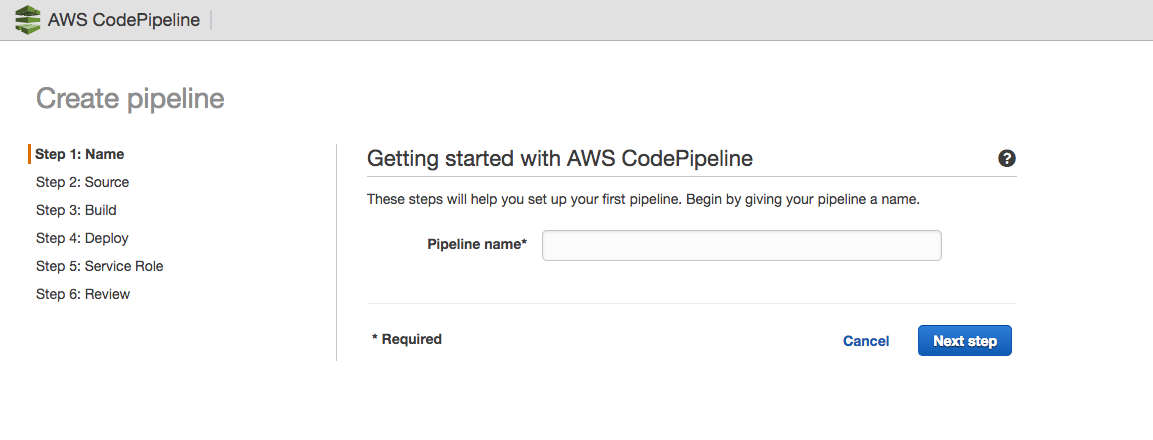
This name should be descriptive and follow whichever naming conventions you have in your organization. Click "Next Step"
Choose a Source Location
I really like GitHub. Happily AWS supports it really well. You need to know that you'll need owner permissions to allow AWS to access your repo.
Once you've authorized AWS-CodePipeline-[region] to access your GitHub repos, you can choose one, and also choose the branch which you want to auto-deploy.
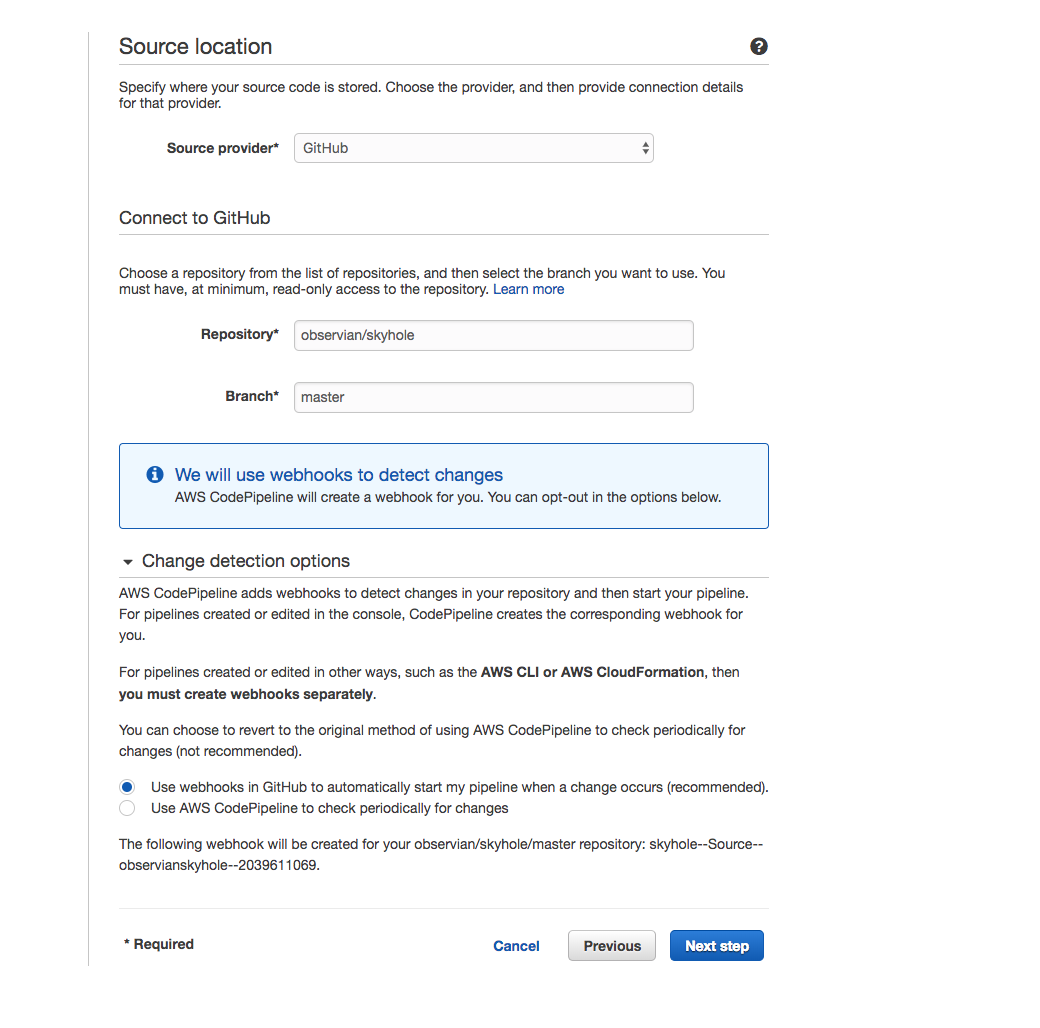
I would definitely choose the webhooks authorization option as opposed to the CodePipeline option. For those unfamiliar with webhooks, what you're authorizing is for AWS to subscribe to notification events that happen on your repo. Every time a commit is pushed, AWS has a lambda auto-configured to listen for that change. That event is what triggers your CodePipeline to start its processes.
The alternative is to have CodePipeline check periodically for changes. This option is one I would choose that is not tied to a CI/CD solution, or that is not time-sensitive.
In this example, I've chosen a repo you might have seen before in my previous post. This project is the one that gives you pi-hole in the cloud. https://github.com/observian/skyhole
Build
Now we are getting somewhere, because this is where we start getting in to specifics about your project. The GREAT thing about having a build step, is you can do ANYTHING here. If you can code it up, you can execute it with one of these build-instances that are available as part of this step.
If you need to:
- Clean up some resources (s3 buckets left over from another execution, for example)
- Save some nested templates out to s3 that your template refers to
- Push a new revision out to a public s3 bucket (a great way to handle s3 static sites)
- Run tests against your code
- Build in some notifications
then you should use the "Build" step. I'm not going to cover all the nuances of CodeBuild in this post, but I will definitely cover it another time.
Strictly speaking, however, CloudFormation doesn't require a "Build" step, which is good news for us, because it gets you up and running more quickly. For now, select "No Build"
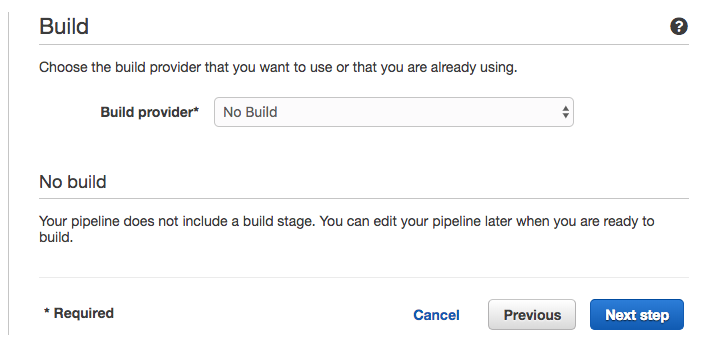
Click "Next Step"
Deploy
We are going to use AWS CloudFormation to do the deploy. Basically this is going to queue up your template, and AWS CloudFormation will Create or update your stack.
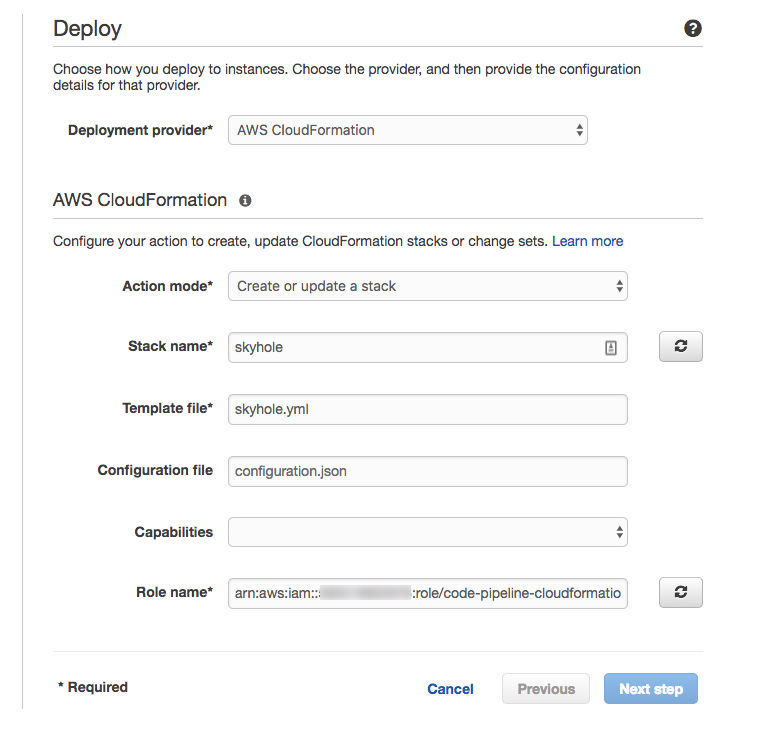
A note on the Role here: This role will need permissions to do whatever is in your CloudFormation script. If you're not already intimately familiar with IAM roles and permissions, the process of setting up your first CloudFormation script will teach you by displaying "CREATE_FAILED" until you get the permissions right. Happily, the permission that is needed is usually displayed in the EVENTS tab of your stack. AND now that you know how to source control this stuff, you can easily add the permission and re-run the pipeline.
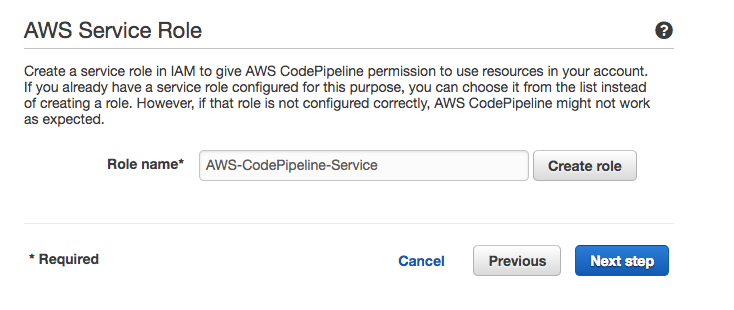
AWS Service Role
If you've never created a service role before, go ahead allow the CodePipeline Service to create one for you. The default role has all the permissions it needs. If you are in an organization where more granular control over permissions is required, you can create a custom role that satisfies those permissions. Which permissions are needed is beyond the scope of this post, though.
Review your pipeline
At this point you should have everything you need. CodePipeline creates a custom s3 bucket to store artifacts from your build project. You can see that in "artifact location" under "Pipeline Settings."
The rest should be fairly straightforward. Click "Create Pipeline."
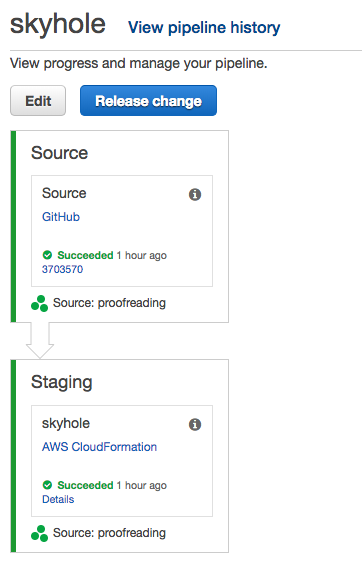
Watch it roll!
CodePipeline automatically pulls the latest commit from your repo, and begins to roll it through your stages. The resulting screen is where you can see it. Green == good, red == bad.
You can also watch the progress the traditional CloudFormation way by tuning in to the stack Events the way you're used to.
If you run in to problems here, check your template syntax or your permissions. Those are the two things I ran into the most.